
How to Install AirTouch on Windows in Five Minutes

To install AirTouch on Windows, run the installer, launch the app from the Start menu, enter your license key, and raise an open palm in front of your webcam. The cursor follows your hand, and a pinch of your index finger and thumb is a click. In most setups the whole thing takes about five minutes, with no SDK and no special hardware.
Prefer to watch? The AirTouch video tutorials cover camera setup, gesture mapping, and the advanced settings, each with a full transcript.
This is the first tutorial in our getting-started series for AirTouch, the gesture control and hand tracking software that turns any standard camera into a touchless controller. Here's the full walkthrough.
What you need before you begin
An internet connection. AirTouch needs connectivity to install and to run.
A recent PC. A 10th-generation Intel Core i3 or better, with 8 GB of RAM, running Windows 10 or 11.
A dedicated camera. A built-in or USB webcam that AirTouch can use exclusively. If you're not sure it works, open the Windows Camera app first and check.
Step 1: Install and launch
Uninstall any previous version of AirTouch first. Then double-click the installer (Airtouch_vxxx-win64.exe), launch AirTouch from the shortcut in the Windows Start menu, and enter your license key when prompted. If you don't have a key yet, a free trial gets you one.
Step 2: Check your frame rate
When AirTouch opens, its live video feed appears. Raise your hand and look at the FPS counter in the upper-left corner of the feed. You want 20 FPS or higher; that's the threshold where hand tracking feels immediate rather than laggy. If you're below 20, our camera setup tutorial covers the fixes, from USB ports to driver updates.

Step 3: Frame your camera
A well-framed camera is the single biggest factor in a good first session. Roughly a quarter to a third of your torso should be visible, with your primary hand near the center of the frame, and you should be able to reach every edge of the screen comfortably. The quick path: turn on AutoZoom in Advanced Settings and AirTouch frames you automatically. The manual path is covered step by step in the camera tutorial.
Step 4: Your first gestures
Raise your hand with an open palm and move it around. The cursor follows. Point it where you want, then pinch your index finger and thumb together to click. Hold the pinch while moving your hand to drag and drop. Return to an open palm to release.
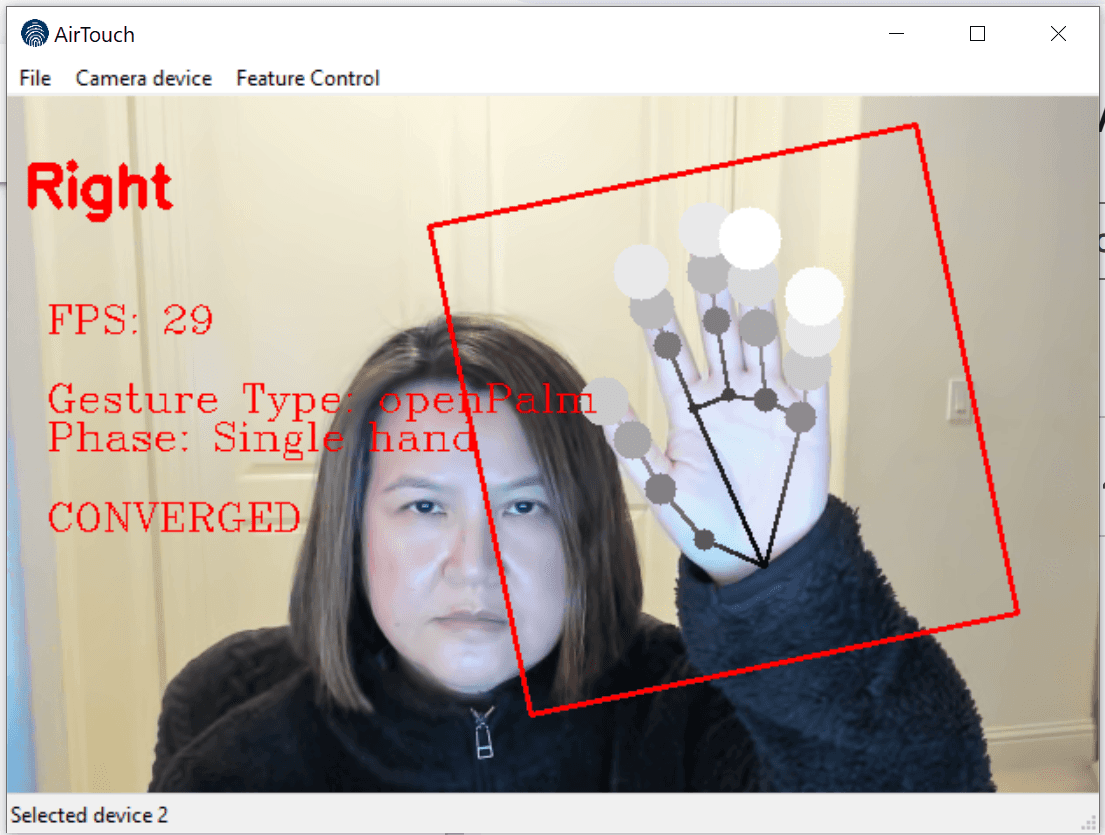
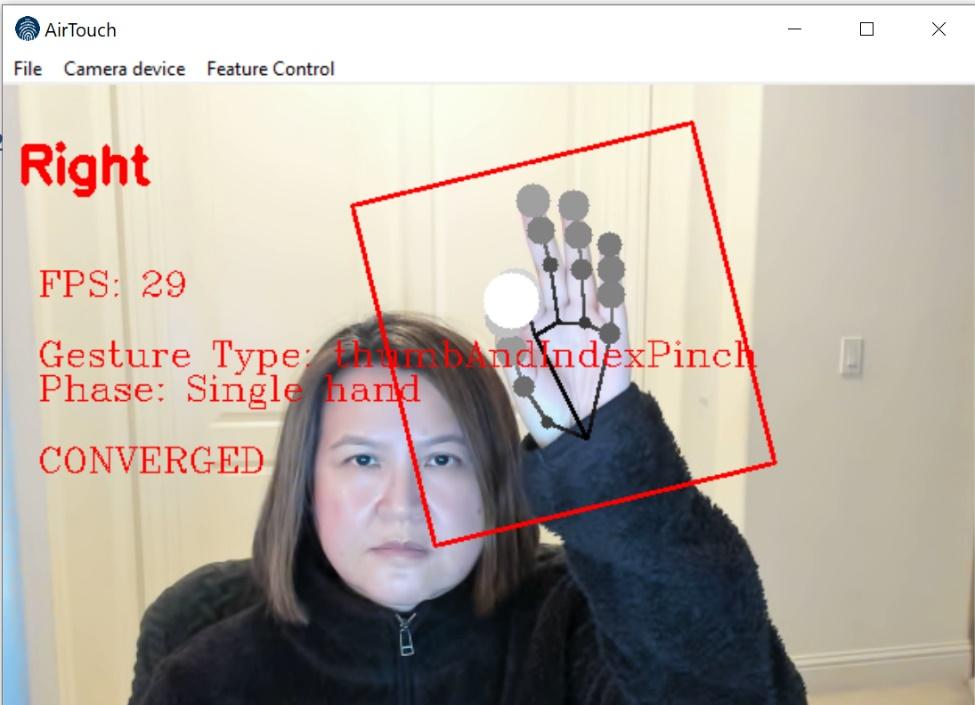
That's the whole core loop. Because AirTouch maps gestures to standard mouse, keyboard, and touch input at the operating system level, gesture control now works across every app on your computer: the browser, your slides, your imaging viewer, all of it. You can minimize the video feed window and keep working; closing it shuts AirTouch down.
How do I use a different webcam?
Open the Camera Device menu in AirTouch and pick your camera from the drop-down list. Any standard RGB camera works: built-in, USB, or most IP cameras. If responsiveness matters, favor the camera that sustains the highest frame rate.
What's next
Out of the box you have point, click, and drag. The fun starts when you map the rest of your hand: our gesture list and mapping tutorial shows every gesture AirTouch recognizes and how to bind each one to clicks, keys, and shortcuts. Setting up on a Sony Spatial Reality Display instead? There's a dedicated SRD guide.
Don't have AirTouch yet? Start a free trial and you'll be pointing at your screen in about five minutes.
Related: every AirTouch gesture and how to map it, camera setup for hand tracking, and gesture control and hand tracking software.
Watch the series: AirTouch video tutorials.
© 2026 Neural Lab, Inc.
Designed and built in Sunnyvale, CA